Your home’s siding takes a beating from sun, rain, wind, and temperature swings—but most of the damage happens gradually and can be prevented. After inspecting thousands of homes, I’ve identified the most common siding failures and the best ways to stop them before they become costly repairs.
1. Warping & Buckling (Vinyl & Composite Siding)
Why It Happens:
- Improper installation without expansion gaps
- Intense heat from reflected sunlight (windows, pools, light-colored driveways)
- Poor-quality thin vinyl that can’t handle thermal movement
Prevention Fixes:
- Install siding with 1/4″ gap between panels and trim
- Choose thicker .044″-.055″ gauge vinyl in hot climates
- Avoid dark colors on south/west exposures (they absorb more heat)
Pro Tip: If panels warp, wait until evening till they cool—they may snap back into place.
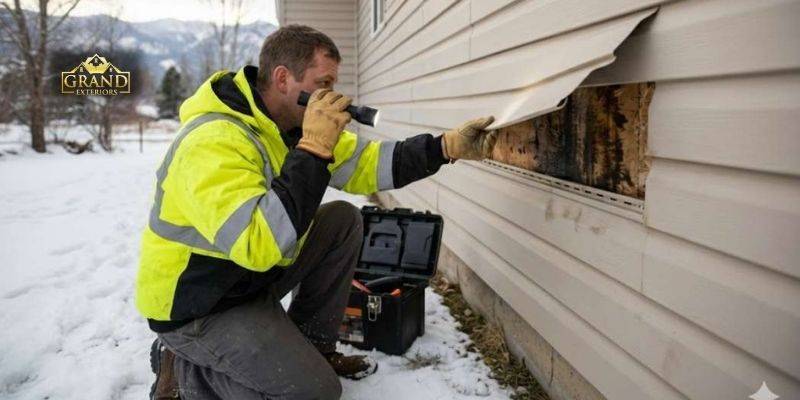
2. Moisture Trapping & Rot (All Siding Types)
Hidden Danger Signs:
- Bubbling or soft spots when pressed
- Musty smells near exterior walls
- Peeling interior paint
Best Defenses:
- Install rain screen drainage mats behind siding
- Use corrosion-resistant flashing at all joints
- Keep shrubs 12″ away from walls for airflow
Emergency Fix: For small wet areas, drill weep holes at the bottom (call a pro for major damage)
3. Fading & UV Damage
Worst Offenders:
- Dark blues/purples (fade fastest)
- South-facing walls
- Cheap paints/thin vinyl
Color-Saving Solutions:
- Buy UV-inhibited siding (look for ASTM D6864 rating)
- Choose lighter earth tones that fade less noticeably
- Apply vinyl-safe protectant every 2 years
Did You Know? Quality vinyl siding should fade less than 5% in 10 years.
4. Impact Damage (Hail, Debris, Lawn Equipment)
Most Vulnerable Areas:
- Lower 4′ of walls (weed whacker zone)
- Corners near driveways
- Gable ends
Protection Plan:
- Install impact-resistant siding (Class 4 rated)
- Create gravel borders near vulnerable walls
- Store ladders/yard tools away from siding
Temporary Fix: Use matching siding repair tape on small dents until replacement
5. Pest Infestations (Woodpeckers, Bees, Rodents)
Common Entry Points:
- Gaps under corner trim
- Loose utility penetrations
Weep holes
Pest-Proofing Tactics:
- Seal openings with stainless steel wool (mice hate it)
- Install woodpecker deterrents (reflective tape works)
- Use hardened foam sealant on pipes/wires
Warning: Never caulk over weep holes—they’re needed for drainage!
The Prevention Plan:
To fortify your home against these invaders, start by sealing all gaps around utility lines, vents, and corners with stainless steel wool (which rodents can’t chew through), install reflective deterrent strips or predator decoys to scare off persistent woodpeckers, and schedule annual inspections of your siding’s underside and weep holes—especially in early spring when pests are most active—to catch problems before they escalate into full-blown infestations.
6. Cracking & Brittleness (Older Vinyl & Fiber Cement)
Main Causes:
- Freeze/thaw cycles
- UV degradation over 15+ years
- Improper storage before installation
Rejuvenation Tips:
- Apply vinyl conditioner to restore flexibility
- Replace brittle corner caps first (they fail earliest)
- Consider full replacement if >30% of siding is cracked
Test Flexibility: Bend a spare piece—if it snaps, it’s too old.
The Prevention Plan:
Combat this inevitable aging by applying a UV-protectant vinyl conditioner every two years to maintain elasticity, replacing any cracked panels immediately (starting with high-stress areas like corners and trim), and considering a full siding replacement if more than 30% of the surface shows signs of brittleness—because patching aged siding is often like putting bandages on a failing system.
7. Mold & Algae Growth
Prime Growing Conditions:
- Shaded north-facing walls
- Homes near trees/water
- Humid climates
Elimination Strategies:
✔ Wash with oxygen bleach solution (safer than chlorine)
✔ Install zinc or copper strips under roof edges
✔ Improve yard drainage to reduce moisture
Never Use: Pressure washers >1,500 PSI—they force water behind siding
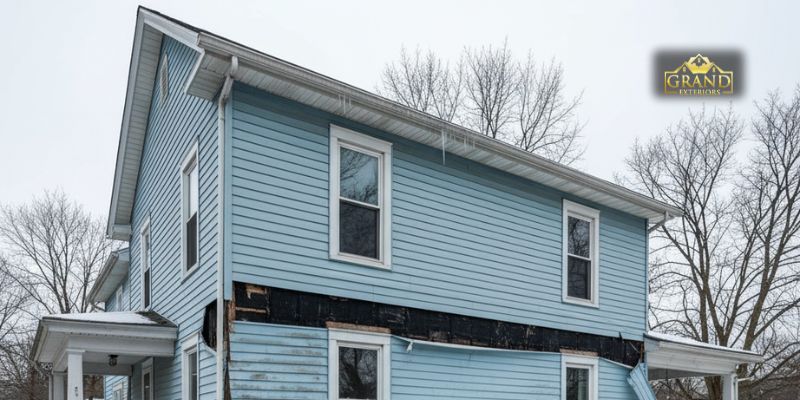
8. Poor Installation
Red Flags:
- Wavy or uneven panel lines
- Visible nail heads (should be loose for expansion)
- Missing J-channels around windows
Pre-Installation Musts:
✔ Verify if the contractor is manufacturer-certified
✔ Check that housewrap is properly sealed
✔ Require expansion space at all trim
Pro Tip: Take photos during installation to verify proper techniques
Bonus: Seasonal Maintenance Checklist
Spring:
- Inspect for winter damage
- Clean siding with a soft brush
- Re-seal around windows/doors
Summer:
- Check for heat warping
- Trim back vegetation
- Treat for mold if needed
Fall:
- Clear leaves from gaps
- Verify proper drainage
- Store patio items away from walls
Winter:
- Prevent ice dam runoff
- Watch for pest entry
- Remove heavy snow piles
When to Call a Professional
Immediately If:
- Siding is pulling away from the house
- You see interior water stains
- Multiple panels are damaged
Save Money By:
Grouping repairs (don’t fix one panel at a time)
Buying extra matching siding during the initial install
Scheduling off-season inspections
Final Thought:
Identifying siding problems early can double its lifespan. Set phone reminders to walk your perimeter every season—it takes 10 minutes but saves thousands.
Vinyl siding is durable, but this does not mean that it is immune to wear and tear. From cracks and molding and discoloration, siding issues can be secret to you – and if uncontrolled, they can give rise to large, expensive problems. Understanding the most common vinyl siding problems is the first step in protecting the exterior of your house. Regular inspection, proper cleaning and smart installation practices go a long way to increase your siding life and preserve the curb appeal of your home.