Storm season can be tough. A roof is the primary protection for your home and so it has a lot to withstand – heavy rain, high winds, hail, and flying debris all at once. Actually, most roofs suffer damage that is not at all easy to detect.
Little fissures, lifted shingles, or non-visible leaks may get worse unnoticed and eventually turn into very expensive repairs. Therefore, a candlelight roof inspection after each big storm is a must. It will not only help you to find the damage early but also keep your house safe and prepare valid (if needed) insurance claims. A detailed and step-by-step checklist for successful roof inspection after the storm has been presented below.
1. Conduct an Initial Ground-Level Safe Check
Before you climb or get in touch with a roofer, start with a ground examination of your roof. Ground examinations are a quick way to better assess visible damage and unsafe conditions.
You should look for:
- Missing, cracked, or curled shingles.
- Disconnected gutters or downspouts are falling.
- Shingle granules collected and piled around the downspout (a sign of rotting).
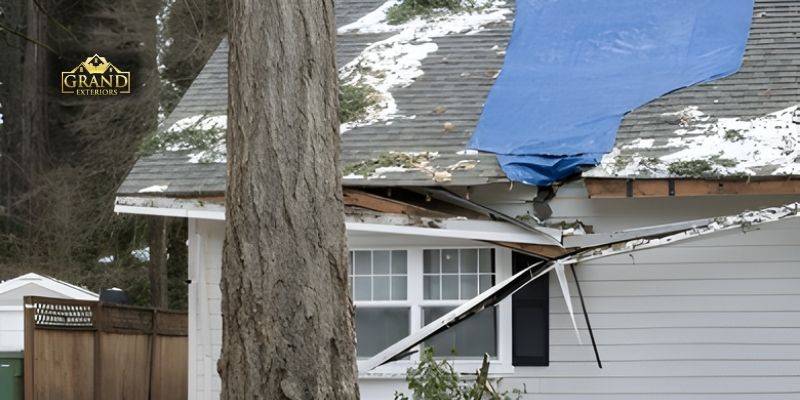
- Tree branches or other debris are lodged onto the roof.
- Swaying roof lines.
Tip: You can also enhance your view with binoculars – it’s a safety measure for finding an issue.
2. Look for Signs of Hail or Impact Damage
Hail damage is not always apparent immediately, especially to a person who has not been trained. At times, it is indicated by very fine dimples or loss of granules.
- Round depressions on shingles or metal flashing.
- Shingles that are bruised (areas feeling soft when lightly touched).
- Dents on vents, frames of skylights, or gutters.
Reason: Even small hail injuries can cut your roofing’s lifespan and make manufacturers’ warranties void if not addressed.
3. Inspect Attic and Ceilings from the Inside
It is not always easy to spot the damage from outside. Water leakage first comes out from the attic to be visible.
Search for:
- Water stains or shadows on the roofing timber and insulation.
- Odors of ventilation dampness or mold (indicating growth).
- Light through the roof boards or joints.
- Insulation that is dripping or wet near vents or chimneys.
Tip: Do an inspection after heavy rain always—leaks can be found easier when the roof is wet.
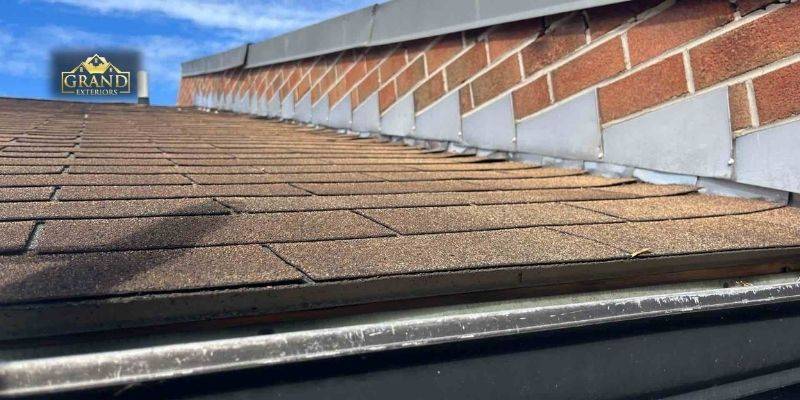
4. Don’t forget about the roof edges and eaves
High winds can easily pull off shingles or the roof edges, which are usually the most vulnerable, and can sustain damage.
Be attentive to:
- Shingles that are lifted or missing at the edges.
- Fascia boards or soffit that are damaged.
- Eaves that have water stains on their undersides.
Tip: The roof edges are the first line of defense – check for any looseness.
5. Document Everything
If you are going to file an insurance claim, then well-done documentation will quicken the process.
Do the following:
- Make the damage evident by taking and filming it clearly.
- Mark the calendar and put the storm event in the log.
- Save the bills for the repairs or professional inspections.
Tip: There are insurance companies that will need damage reports done in a hurry, so be speedy in your actions.
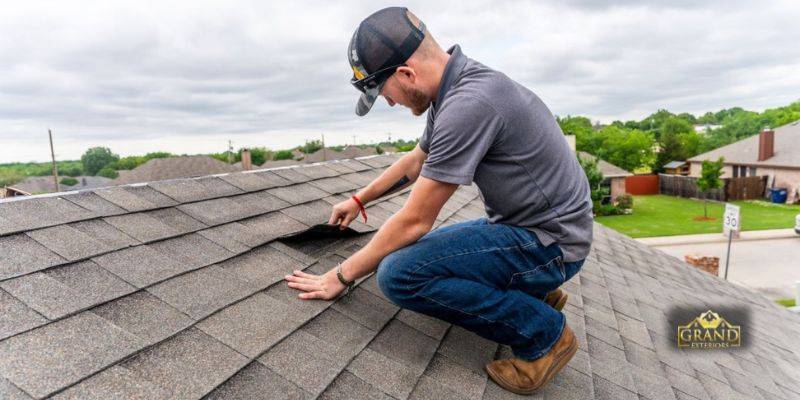
6. Schedule a professional inspection
While you can see your roof looks good from the ground, there could be damage that’s lurking underneath. Roofers have specialized tools — moisture meters, etc., infrared scanners, etc., and more — roofers can detect and even see leaks and weaknesses that you can’t view.
Hire a certified roofing contractor to:
- Provide a complete, thorough inspection (interior and exterior)
- Provide you with .a written report and recommendations for repairs
- Provide assistance in filling claims if needed.
Conclusion: A Small Inspection Today Prevents Big Repairs Tomorrow
Once the storms pass, your roof merits as much attention as any other area of your home because in reality, your roof has taken a beating from nature. Going through the post-storm inspections shouldn’t strictly be about visible leaks or missing shingles, but rather, the integrity, safety, and value of your home. The act of going through this checklist of inspected items, which might be everything from gutters and flashing to attics, and noting what you inspected will keep you ahead of possible future damage. What we consider a small crack might turn into a large repair expense the following week. Doing at least a thorough inspection (and following up quickly) will actually help protect your home before the next season comes along again.