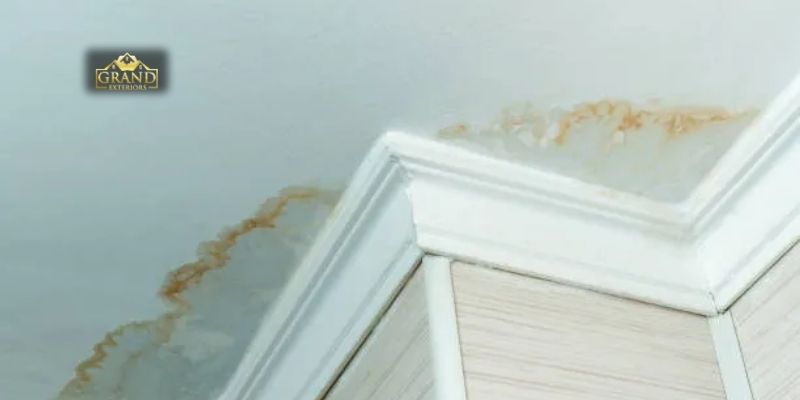
During winter storms that produce ice dams, many homeowners find themselves frequently inspecting their ceilings for signs of leaking water and wondering where on the ceiling will seem like the best place for the leak to occur. In most cases, the source of water intrusion is not suspected because homeowners do not recognize where they have installed roofing products incorrectly. With the help of roofing professionals, it is believed that as much as 90 percent of winter leaking is caused by failure at the intersections of roof slopes—in seams and joints of roofs. Flashings (which are either metal or rubber) provide the protection between an attic full of water and the points of vulnerability on your home.
While flashing has received little recognition in the past, it is a very important waterproofing accessory that protects your home from snow, wind, and other elements on the exterior of your home, as well as from ice dams, creating water accumulation on the interior. In addition to helping protect your home from winter leaks, proper flashing installation of a roof will be the most critical factor in providing you with adequate protection from catastrophic winter damage that could occur to your home.
The Ultimate Test of Flashing Is Winter:
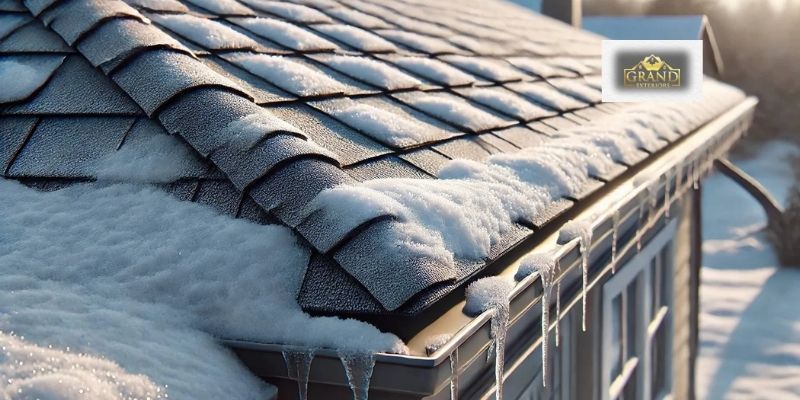
The highest volume and most aggressive types of water are delivered by Mother Nature in winter. Here are the top three ways this volume of water can damage your roofing system with regard to flashing:
- Ice Dams: Ridges of solid ice that form at the bottom edge of roofs. Melted ice is trapped behind these ridges and begins to back up behind the ridge; this water will always seek a path of least resistance and will usually come in contact with the flashing that collects melting snow/ice at the roof-to-wall connections.
- Wind-Driven Snow: Windy conditions can create the perfect opportunity for high-velocity winds to push snow into locations that conventional rainfall would never be able to reach.
- Freeze-Thaw Cycles: A small amount of water that enters through a small crack in your roof will freeze, expand and, on a nightly basis, will work the crack larger. When more water enters, it will freeze and widen the crack even larger. In a short time (sometimes weeks), what began as a hairline crack could become a significant leak.
Flashing is engineered to handle this onslaught. When correctly installed, it acts as a sealed, impenetrable gutter system that channels water away from these critical junctions and safely back onto the roof surface.
Flashing Prevents Problems in High-Risk Areas:
1. The Risk of a Roof-to-Wall Joint (Step Flashing)
The risk: Water penetration occurs where there is a slope (such as by a dormer) simply because snow melt accumulates there.
How to prevent water from penetrating: Use a series of rectangular-step flashings under siding and on top of the roof shingles. Each step flashing will direct all water down towards the next row of roof shingles so it cannot reach the sidewall joint, thus preventing ice melt from building up behind the siding and breaking into the wall cavity.
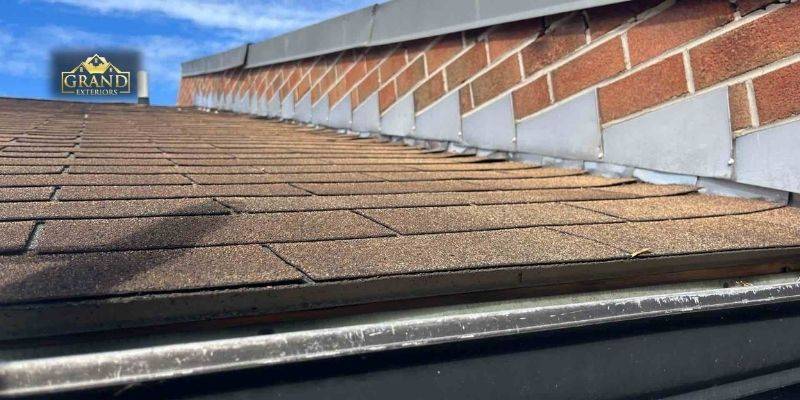
2. Chimney Flashing
Risk: Chimneys are a large, multi-faceted interruption that are in a pool of melting snow. The connection between the roof and the chimney is a complicated and multifaceted intersection, making it nearly impossible to have shingles alone successfully seal the joint.
How Flashing Prohibits It: Professional chimney flashing is constructed in two parts: step flashing covering the sides of the chimney (up slope) and cricket or saddle flashing covering the up-slope side of the chimney, on the up-slope. The cricket or saddle serves to separate the falling, melting snow and water from the chimney and allows it to flow around the chimney rather than down onto the chimney. Counterflashing is built into the mortar surrounding the chimney’s base flashing, providing a secure, waterproof connection, allowing the chimney and roofing materials to move independently yet still provide a waterproof seal, as those two different materials move and contract at different rates.
3. Valley Flashing
The Risk: Roof valleys are the closest thing to gutters on your roof, meaning they have to take a lot of water and also melting snow. In winter, they can get completely blocked with ice, which leads to extremely high pressure and weight on that already critical seam.
How Flashing Prevents It: The properly installed metal valley liner (generally made of aluminum or galvanized steel) forms an uninterrupted, water-proof channel under the shingles. Even if the ice is very thick, the water that has been able to move underneath the ice still comes off the roof through the lightbearers’ paths without any nail holes and seams that could leak being exposed.
4. Skylight & Vent Pipe Flashing
The Risk: These fixtures put holes in your roof deck. The sealing materials that are used in these places are susceptible to breaking due to the cold, and snow may stack up on their sides.
How Flashing Prevents It: Current skylights and vent boots are manufactured with built-in, flexible flashing collars (usually made of rubber or thermoplastic). These collars are specifically made to create a seal similar to a gasket around the fixture and are positioned under the shingles above and over the shingles below. Their flexibility makes it possible for them to endure thermal movement without breaking.
5. Drip Edge & Ice-and-Water Shield (The Flashing Allies)
Quite remarkable that although not traditional flashing, these components together act to create a perfect waterproofing system:
Drip Edge: This is a metallic edge that goes on the roof and not only directs water into the gutters but also keeps it from wicking back under the shingles into the roof deck—the area where eaves rot is likely to develop during the winter.
Ice-and-Water Shield: This is a kind of underlayment that sticks to itself and is made of rubberized materials, which is placed under the shingles in the most vulnerable areas (eaves, valleys, and around penetrations). In the event that water does seep through the shingles, this membrane will not only seal around the holes made by the nails but will also provide a final, watertight backup—something that is often referred to as “the last line of defense.”
What Happens When Flashing is Improperly Installed
Flashing that is installed incorrectly creates a system failure rather than a minor leak. There are serious and expensive consequences resulting from poorly installed flashing:
Structural Rot: When the flashing is not able to properly cover the roof deck or wall stud framerate, then water will be caught under it and will eventually decay the structural materials like roof deck, wall sheathing and framing lumber, which could lead to the weakening of your house.
Health Hazards and Mold: If dampness becomes enclosed behind the wall insulation, then along with it, a perfect environment for the growth of toxic mold will be created.
Conclusion: An Ounce of Flashing
Flashing has become my most tactical layer when discussing winter leaks. It is one of the tiniest points to be vigilant about because it is one of the last places that water will want to go through. The only places that water is going to be unwilling to travel through as an adult will be those specifically labelled with flashing, which is typically put on by skilled craftspeople.
You should think about the additional expertise and time required to create good flashing this winter when you are toasty at home. The deserved “silent soldiers” of your home will be working under the snow, preventing water from leaking anywhere except in the pipes, which is where you want it. You do not have to wait for a drip to remind you how much of an improvement having flashing produces. Being proactive when it comes to winter leaks is no longer just a good idea. Often, prevention is as much about protecting against leaks as correcting them.