The period following a devastating storm is a very nerve-wracking time for a homeowner to deal with. Nature’s fury, in the form of high winds, heavy rain, and hail, can result in the roof, which is the most important protective barrier, losing its capability to protect the house. Once such a situation arises, a quick, safe, and orderly response becomes crucial, not just for preventing any more damage to the interior but also for keeping your real estate project alive in the long run.
This manual elaborates upon the essential measures that the homeowners should take right after a storm, trying to find a middle ground between daring and caution that is necessary to avoid risking life and property.
Phase 1: Immediate Post-Storm Actions – Safety and Assessment
The safety measure should first and foremost, along with the assessment of damage done.
1. Make Personal Safety the Top Priority
- Stay Inside: Do not go outside during the storm or right after it if the situation is still dangerous, due to strong winds or falling trees and other things.
- Be Careful with Unseen Dangers: Consider the possibility of power lines being down in the water or in the vicinity of your house. Do not go near such lines and call your power company to report that there is a downed line.
2. Perform a Preliminary Inspection of the Interior
- Your evaluation should start with the interior of your home in a safe location, which is the attic, to be precise.
- Look for Visible Daylight: Check the roof deck’s underside for daylight in case there is a breach.
- Water Intrusion Detection: Search for the signs of water leaking, e.g. soaking, staining or wetness of the wooden beams, then put buckets under active leaks to avoid water damage.
- Record Everything: Use your cellphone to make clear and bright photos and videos of all the damage you see, both inside and outside. This visual proof is very helpful for insurance claims and consultations with contractors.
3. Carry Out a Ground-Level Exterior Examination
After the situation permits, do a visual inspection from the ground.
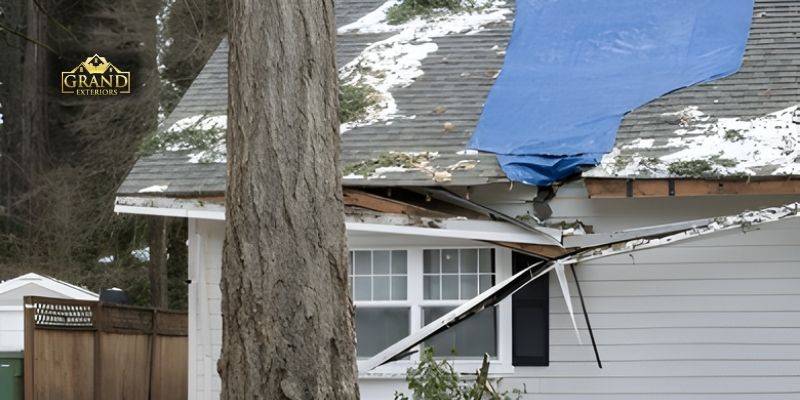
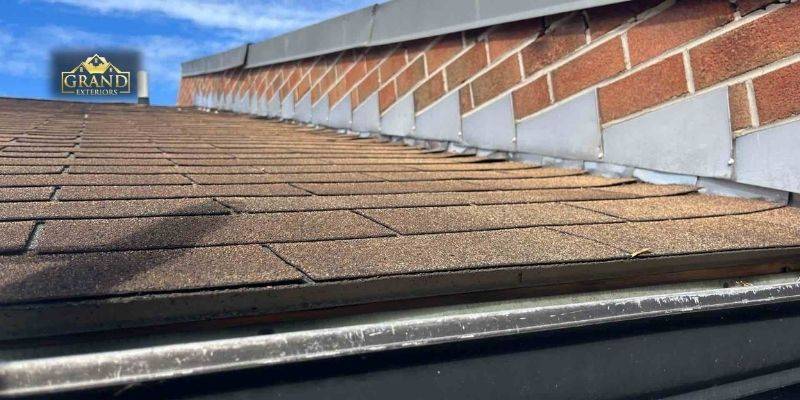
- Identify Evident Destruction: The use of binoculars can assist in spotting shingles which are missing, fractured or curled, also, damaged flashing around chimneys and vents, or granule accumulation in the gutters and downspouts, suggesting shingle wear.
- Structural Issues: Perform a thorough check of the rooflines, including the presence of sagging and tree branches that are old (and possibly still standing), which are now lying on the roof.
4) Mitigation & Interim Solutions:
The mitigation or interim solution phase is designed to create stability within the structure while waiting for the long-term repair phase.
a. Start Temporary Confinement
For Active Leaks: Still using buckets, tarps, or towels to contain water as suggested. For bulging ceiling stains that are larger, gently puncture the middle with a screwdriver and set a bucket below the point to ease water pressure and avoid a major cave-in.
For Minor Outdoor Breaks: In case it’s safe and reachable, a strong waterproof tarp may be put over a small damaged spot and properly tied so it won’t be lifted by the wind. Nevertheless, this should preferably be done by a roofing expert most of the time.
b. Contact Your Insurance
Contact your insurance provider immediately and inform them about the potential claim.
c. Claim: Provide your insurance company with an initial description of the damages.
Understand Your Policy: Understand what is included in your coverage, deductibles, and the procedure for filing claims. Your insurance company will likely request that an adjuster inspect the damages.
5. Professional Roofing Services That Are Engaging:
The repair quality and durability largely depend on this step.
Find a Contractor with a Good Reputation
- Today’s “storm chaser” contractors seem to swarm over the places that were hit by a storm. Even though some of them might be honest, it is still a must to exercise caution.
- Select Local: It is wise to concentrate on the roofing firms that are well-established, local, have a fixed address, and have been operating in your neighborhood for some time.
- Credential Verification: Confirm that the contractor has a license, is bonded, and has liability and workers’ compensation insurance. Get their insurance certificates and specifically those for workers’ compensation and liability insurance.
6. Restoration and Insurance Coordination:
Communication Between Your Contractor and Adjuster.: In a good situation, you should have a trusted roofing contractor meet the insurance adjuster on site and confirm all the damages are well documented, photographed, and included in the repair scope of work beyond the cosmetic. This is essential for you to maximize your claim and get everything covered.
Conclusion: From Emergency to Resolution
A ruined roof is indeed a troublesome problem but if you tactically and systematically approach it, it won’t be that difficult to handle. Your safety should always be the first priority in handling a damaged roof so the necessary measures for mitigation should be implemented without delay right after the incident and you should find a contractor who is licensed, insured, reputable, and experienced in roofing. If you do this, it will make it easier for you to cope with the storm’s challenges, so to speak, than if you had not taken any of these measures.
Keep in mind that the aim is to bring back the house’s safety and stability to the previous level which assures that it will remain a safe and pleasant home for your family.